프론트엔드/Next.js
[Next.js] Next15 API Routes 를 이용해 OgData 추출하고 링크 북마크 만들기
순코딩
2025. 3. 4. 01:23
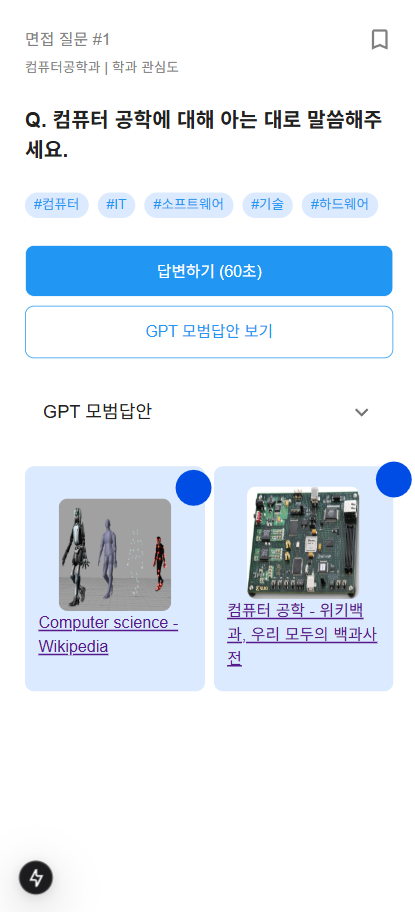
해당 질문에 대한 레퍼런스 링크 URL이 DB에 있다.
컴포넌트가 프롭스로 받은 URL을 통해 API Route에 OG 데이터를 추출요청을 보내고 해당 OG데이터를 통해 북마크를 생성한다.
노션의 북마크 기능을 생각하면 될 듯
src / app / api / og / route.ts
import { NextRequest, NextResponse } from "next/server";

export async function GET(req: NextRequest) {
  const { searchParams } = new URL(req.url);
  const url = searchParams.get("url");

  if (!url) return NextResponse.json({ error: "URL is required" }, { status: 400 });

  try {
    const response = await fetch(url);
    const html = await response.text();

    // OG 데이터를 정규 표현식으로 추출
    const ogTitle = html.match(/<meta property="og:title" content="(.*?)"/)?.[1] || "";
    const ogImage = html.match(/<meta property="og:image" content="(.*?)"/)?.[1] || "";
    const ogDescription = html.match(/<meta property="og:description" content="(.*?)"/)?.[1] || "";

    return NextResponse.json({ title: ogTitle, image: ogImage, description: ogDescription });
  } catch (error) {
    console.error(error);
    return NextResponse.json({ error: "Failed to fetch OG data" }, { status: 500 });
  }
}
api 라우트를 생성한다.
해당 라우트는 파라미터로 url을 받고 해당 url의 OG 데이터를 반환한다.
const getOgData = async (url: string) => {
  const response = await fetch(`/api/og?url=${encodeURIComponent(url)}`);
  const data = await response.json();
  return data;
};
async function printOgDataTest(url : string) {
const ogData = await getOgData(url);
console.log(ogData);
}printOgDataTest("https://example.com")사용 방법은 위와 같다